About rubber testing equipments
U-CAN DYNATEX INC., is an ISO 9001: 2015 , CE, and ISO/IEC 17025:2017 (TAF:2875) certified manufacturer, established in 1985 in Taipei, Taiwan.
Headquartered at Taiwan`s Central Science Park in Taichung, U-CAN is specialised in design and producing 18 major kinds of polymer analytical instruments and testing
equipment including Solution for thermosetting material warpage analysis (PVTCA1), Rheometers, Mooney viscometers, ozone testing chambers, tensile testing machines, filler dispersion analysis instruments, dynamic testing systems, universal static tire testing equipments etc.
U-CAN has 5 branches as well as 2 liaison offices in China. In addition, there are 18 U-CAN agents in 25 countries globally including India, USA, Korea, Japan, Brazil, France and Middle East to provide in time services for U-CAN customers.
Our testing equipment's
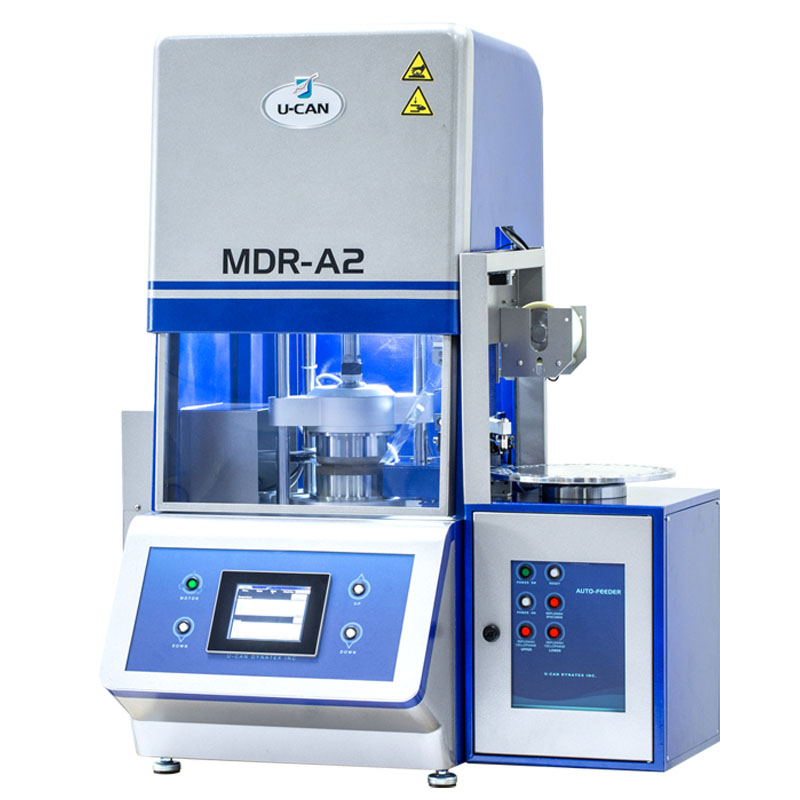
MDR - A2 (Moving Die Rheometer)
MDR - A2 (Moving Die Rheometer)
1. In compliance with ISO 6502, ASTM D5289, DIN 53529, JIS K6300-2, and GB/T 16584.
2. Moving Die Rheometer provides in-depth scorch and optimum cure time analysis.
3. Mis-compounding system advises of possible causes for failed compounds.
4. The latest version of U-CAN’s proprietary software is preinstalled. U-LIMS software is also available for purchase upon request, which allows users to set test conditions and view results remotely via an Internet browser.
5. Export to Excel.
6. Auto feeding sampler.
MDR - A1 (Moving Die Rheometer)
1. In compliance with ISO 6502, ASTM D5289, DIN 53529, JIS K6300-2, and GB/T 16584.
2. Moving Die Rheometer provides in-depth scorch and optimum cure time analysis.
3. Mis-compounding system advises of possible causes for failed compounds.
4. The latest version of U-CAN’s proprietary software is preinstalled. U-LIMS software is also available for purchase upon request, which allows users to set test conditions and view results remotely via an Internet browser.
5. Export to Excel.
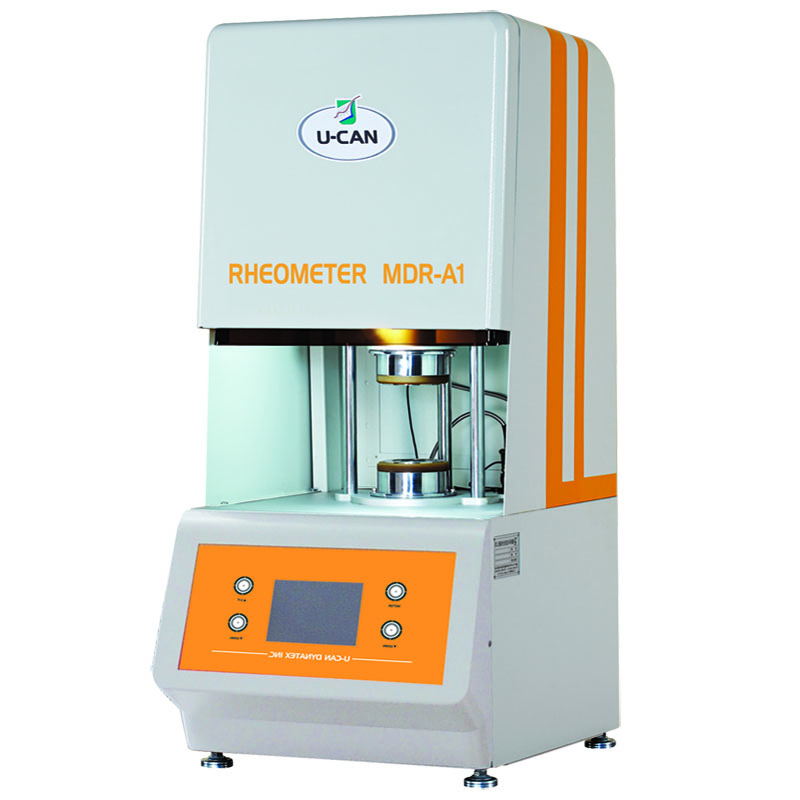
MDR - A1 (Moving Die Rheometer)
MDR - U6S (Moving Die Rheometer)
1. In compliance with ISO 6502, ASTM D5289, JIS K6300-2, and GB/T 16584.
2. Provides various cure data and graphical curves.
3. Simple, quick installation.
4. On the front side, light color indicates whether a sample has passed (in blue) or failed (in red) the testing standards.
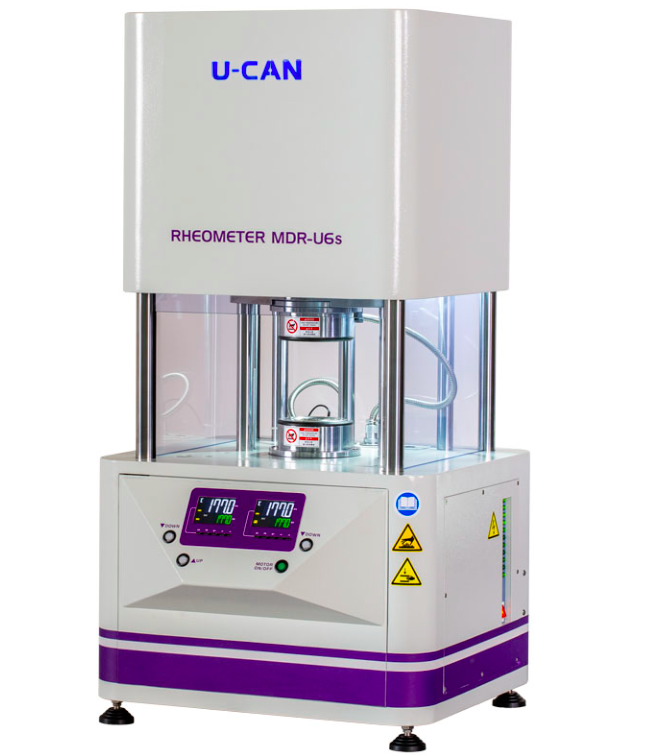
MDR - U6S (Moving Die Rheometer)
UR-2010 SD (Rotorless Rheometer)
1. The UR-2010SD’s upper and lower die cavities feature a rubber
seal that maintains the pressure inside the dies while testing. This model is typically referred to as a MDR rheometer.
2. Both models are in compliance with ASTM D5289, ISO 6502, JIS K6300-2 and GB/T 16584.
3. Auto-cailbration of loss angle in both models.

UR-2010 SD (Rotorless Rheometer)
UR-2010 (Rotorless Rheometer)
1. A. UR-2010 does not include a seal, but rather uses excess rubber from the specimen to seal the die cavity’s internal pressure.
B. The UR-2010 features a larger die cavity and therefore requires more time for heating, more suitable for the slowly curing products.
2. Both models are in compliance with ASTM D5289, ISO 6502, JIS K6300-2 and GB/T 16584.
3. Auto-cailbration of loss angle in both models.
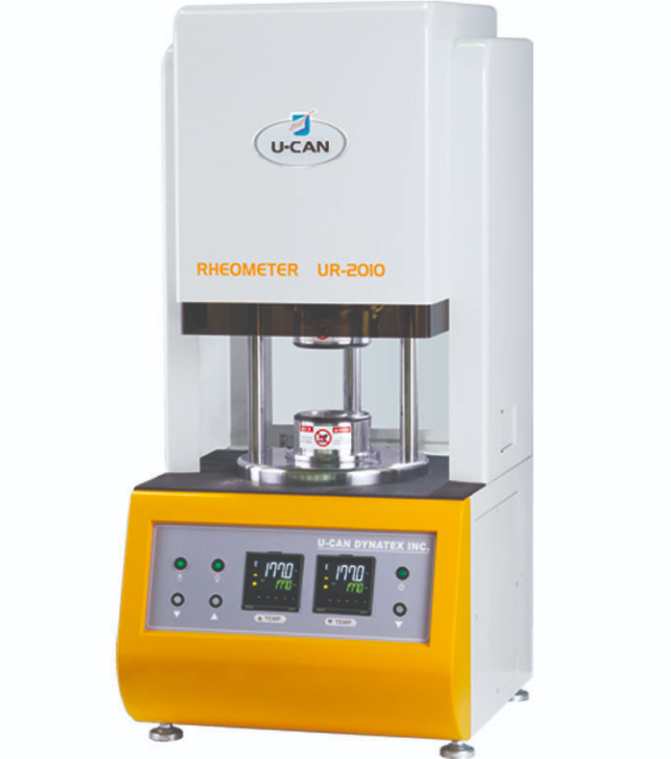
UR-2010 (Rotorless Rheometer)
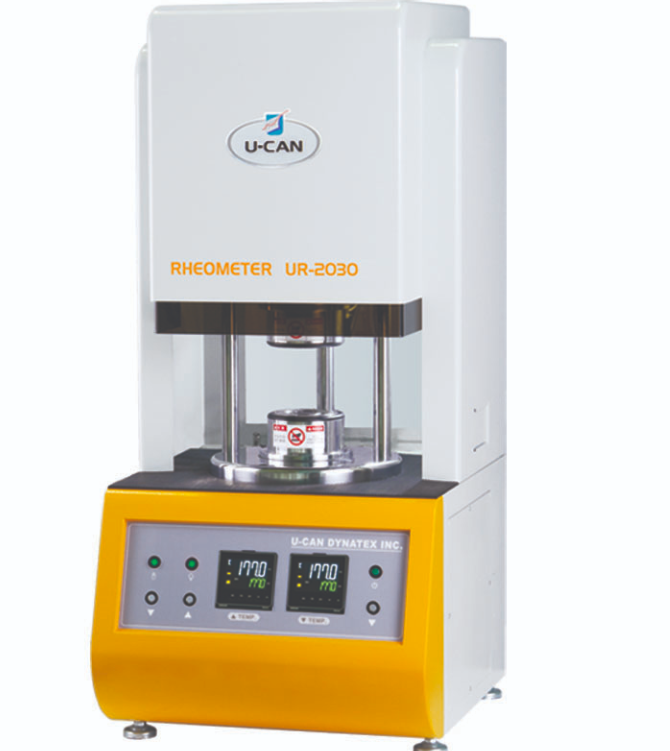
UR-2030 (Foam Pressure Rheometer)
UR-2030 (Foam Pressure Rheometer)
1. A. UR-2030SD is based on UR-2010SD which contains all UR-2010SD’s functions, features, and additional software/hardware for measuring foam pressure.
B. UR-2030 is based on UR-2010 which contains all UR-2010’s functions, features, and additional software/hardware for measuring foam pressure.
2. Both models are in compliance with ASTM D5289, ISO 6502, JIS K6300-2 and GB/T 16584.
3. Both models can be used on measuring crosslinking and foam pressure of rubber or EVA. Suitable for automobile rubber parts , outsole/insole shoes , sports tools , some shock absorption products,…etc.
UR-2030 SD (Foam Pressure Rheometer)
1. A. UR-2030SD is based on UR-2010SD which contains all UR-2010SD’s functions, features, and additional software/hardware for measuring foam pressure.
B. UR-2030 is based on UR-2010 which contains all UR-2010’s functions, features, and additional software/hardware for measuring foam pressure.
2. Both models are in compliance with ASTM D5289, ISO 6502, JIS K6300-2 and GB/T 16584.
3. Both models can be used on measuring crosslinking and foam pressure of rubber or EVA. Suitable for automobile rubber parts, outsole/insole shoes , sports tools , some shock absorption products,…etc.
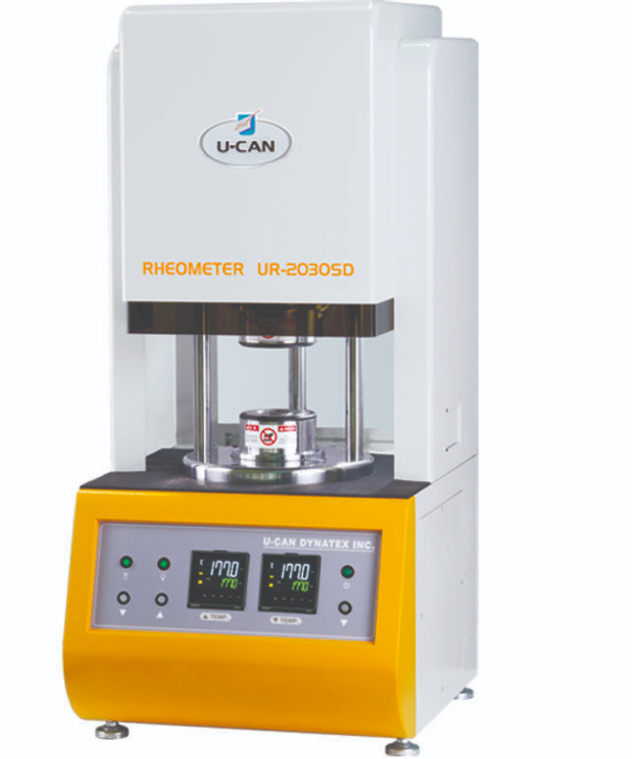
UR-2030 SD (Foam Pressure Rheometer)
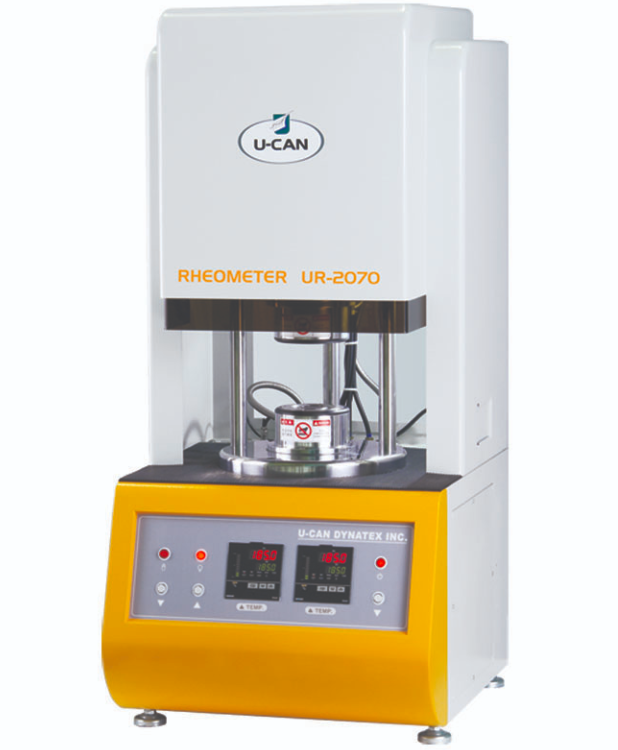
UR-2070 (Oscillating Disc Rheometer)
UR-2070 (Oscillating Disc Rheometer)
1. In compliance with manufacturing standards ASTM D2084 , ISO 6502.
2. Providing S’, S”, S*, ML, MH, CRI, loss angle, tangent δ, etc.
3. Plots and % of compounding homogeneity variation.
4. Excellent reproducibility and repeatibility by our exclusive DSP analyzing program.
5. Automatically calibrate loss angle and torque.
6. High sampling rate up to 1200 points per one oscillating sign wave to reflect the curing and chemical interaction.
7. Automatic zero adjustment at every start of testing.
8. High speed temperature recovery.
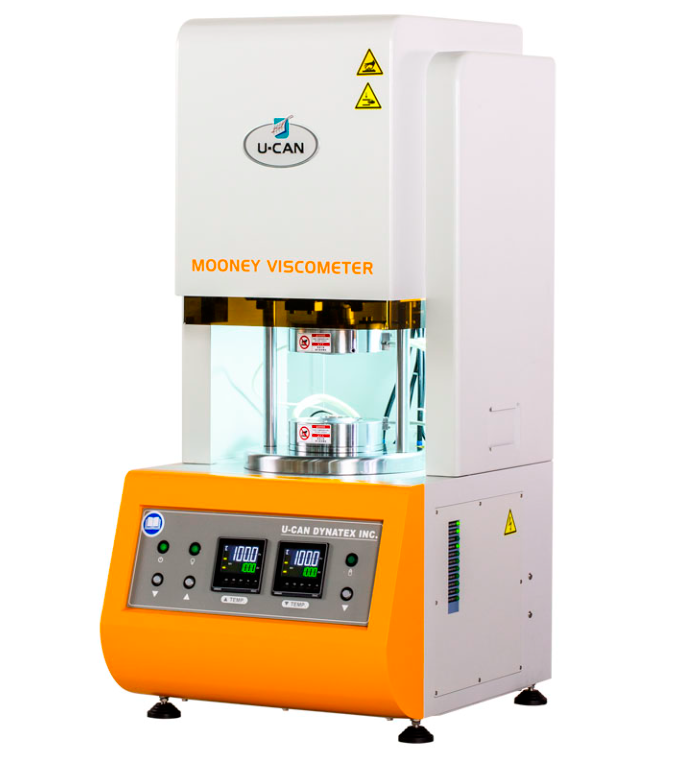
UM-2050
UM-2050
1. In compliance with ASTM D1646, ISO 289, JIS K-6300, GB/T 1232 and 1233.
2. Provides MI, ML1+4, ML1+8, T80, X30……etc, and scorch time T5, T35 ; T3, T18.
3. A. Relaxation time(Tx) to decay X% of mooney viscosity.
B. Power Law Decay Model Analysis : a-Slope, k-intercept, A-area, r-regression coefficient.
C. Plot of log mooney unit versus log time.
4. Provides melting and cure speed rate curves.
5. Automatically resets test readings to zero before each test.
UM-2050 ES Upgraded
1. In compliance with ASTM D1646, ISO 289, JIS K-6300, GB/T 1232 and 1233.
2. Provides MI, ML1+4, ML1+8, T80, X30……etc, and scorch time T5, T35 ; T3, T18.
3. A. Relaxation time(Tx) to decay X% of mooney viscosity. B. Power Law Decay Model Analysis : a-Slope, k-intercept, A-area, r-regression coefficient. C. Plot of log mooney unit versus log time.
4. Provides melting and cure speed rate curves.
5. Automatically resets test readings to zero before each test
6. ES system managing the data sampling, processing and transmission.
7. Compatible with 32/64 bit of windows and OS
8. MS Sql database system for convenient datat management
9. With lot system, user may see test conditions and view test results remotely with internet or mobile device

UM-2050 ES Upgraded
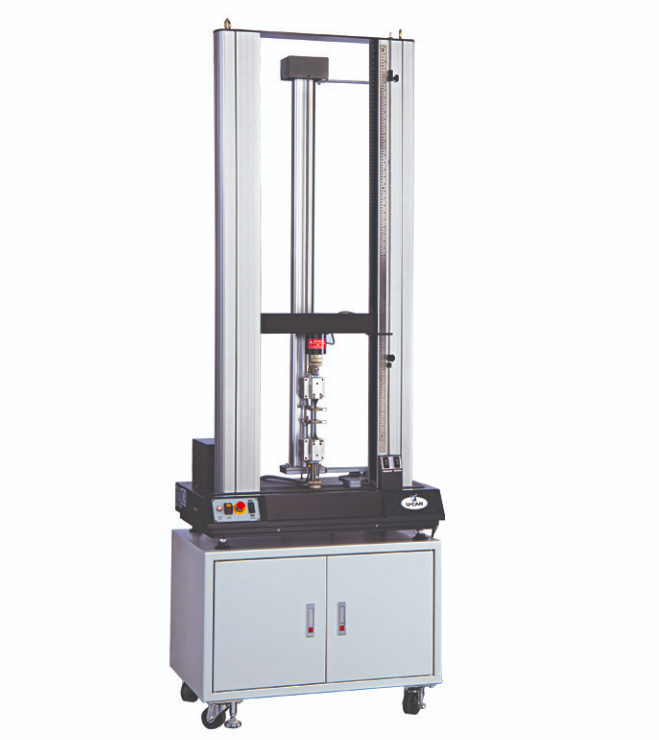
UT-2060
UT-2060
1. Load capacity 2,000 kgf.
2. PC & Software provides automatic data analysis.
3. Various fixtures and load cells available.
4. Includes multiple testing functions.
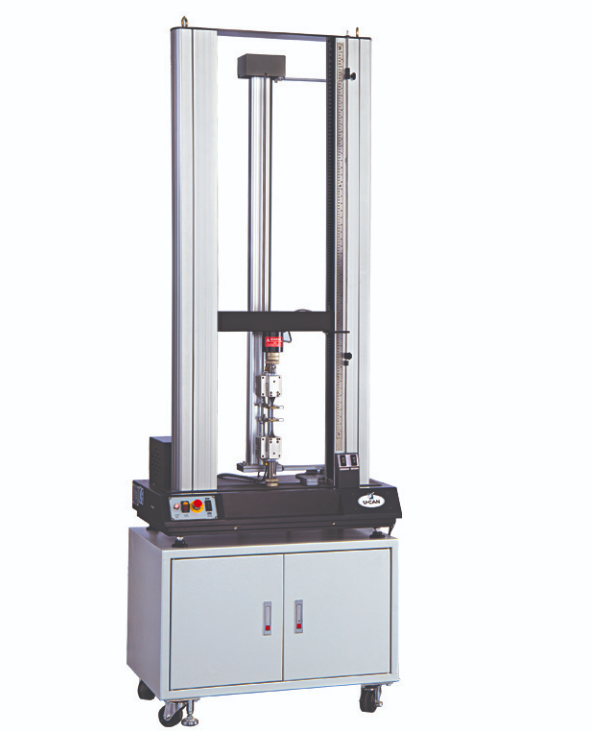
UT-2080
UT-2080
1. Load capacity 1,000 kgf.
2. PC & Software provides automatic data analysis.
3. Various fixtures and load cells available.
4. Extended safety options: protective viewing window, electrical circuit safety system, protective fence.
5. Includes multiple testing functions.
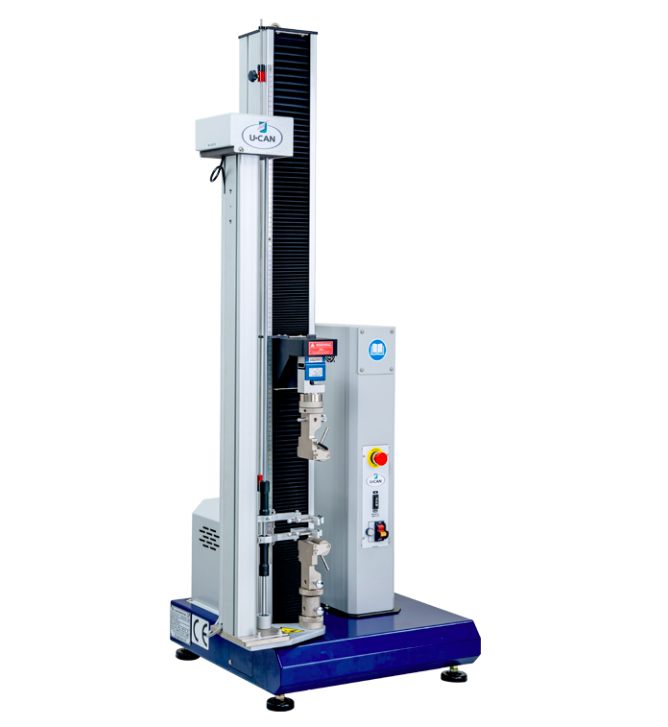
UT-3100
UT-3100
1. Capacity : below 125kgf
2. Providing force, strain, and stress values at breaking point and maximum point.
3. Showing all testing curves on the monitor.
4. Printing out all testing values and curves.
5. Elongation test is an optional function for choosing.
6. Automatic zero adjustmert at the start of each testing.
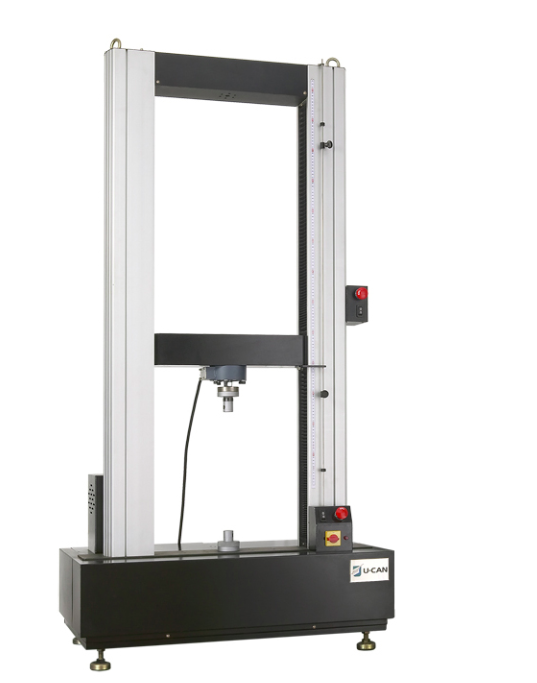
UT-3200
UT-3200
• Capacity : below 5,000kgf
• Windows XP based test system designed for easy operation.
• Automatic zero adjustment at the start of test.
• Applied for testing rubber, plastic, leather, metal, yarn/textile, cable/wire
products.
• Provide tensile strength test, tear test, H-drawing test, compression test
including set-up of its stop force.
• Provide adhensive test able to auto-calculate its average force at low, middle,
high point.
• All test curves and values shown simultaneously while testing. It not only
enables the user to gain and save feedback information for product parameters;
also it allows to recall and print out for documentation purpose.
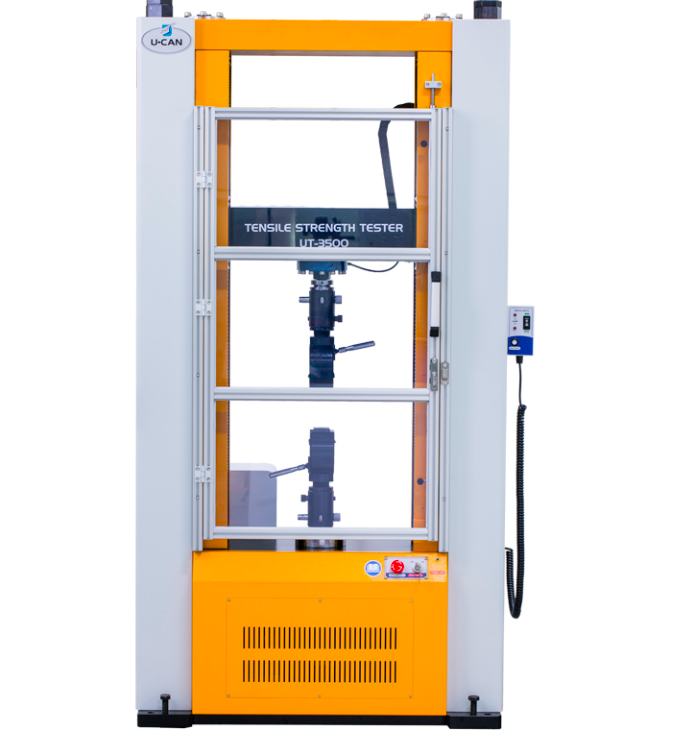
UT-3500
UT-3500
• Capacity : below 10,000kgf
• Windows XP based test system designed for easy operation.
• Automatic zero adjustment at the start of test.
• Applied for testing rubber, plastic, leather, metal, yarn/textile, cable/wire products.
• Provide tensile strength test, tear test, H-drawing test, compression test including set-up of its stop force.
• Provide adhensive test able to auto-calculate its average force at low, middle, high point.
• All test curves and values shown simultaneously while testing. It not only enables the user to gain and save feedback information for product parameters; also it allows to recall and print out for documentation purpose.
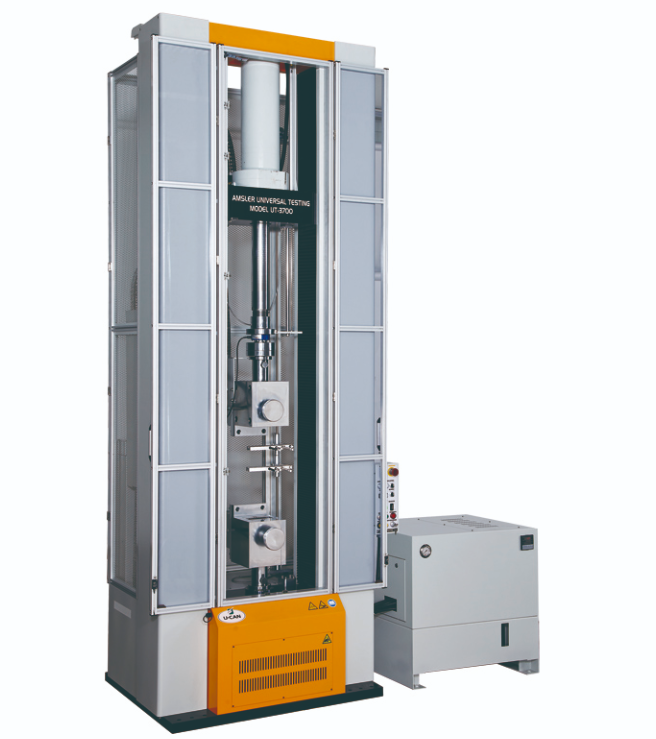
UT-3700
UT-3700
1. Load capacity 25,000 kgf
2. Tests: tension, compression, tear, adhesion, shear strength, bending and drawing.
3. Applications: for testing special rubbers, metals, conveyor belts, continuous tracks, and more.
4. PC and proprietary software provide automatic analysis.
RPA - V1
1. Analyzes the characteristics of rubber samples before, during and after curing.
2. Provides frequency scanning, strain scanning, temperature scanning, and time scanning.
3. Conducts testing in compliance with ASTM D6204.
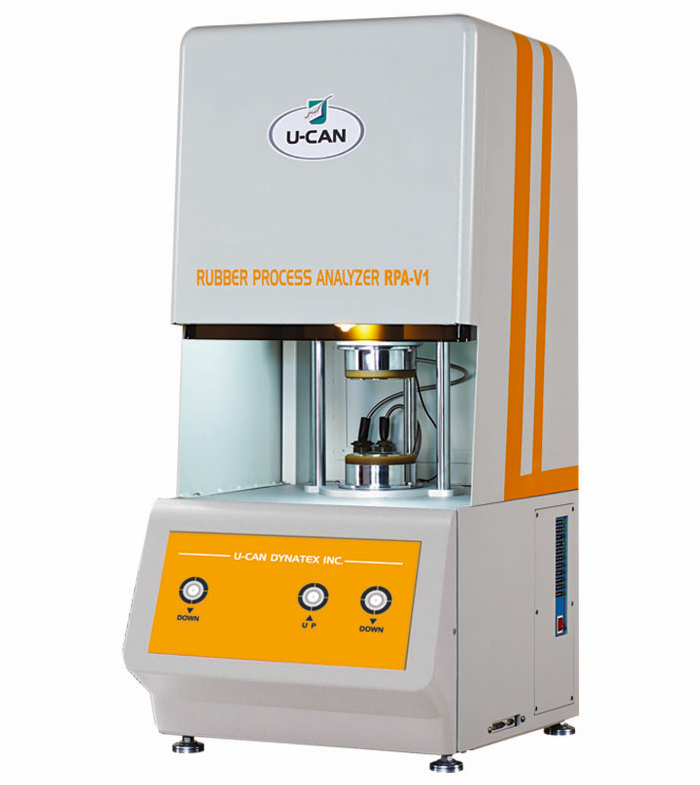
RPA - V1
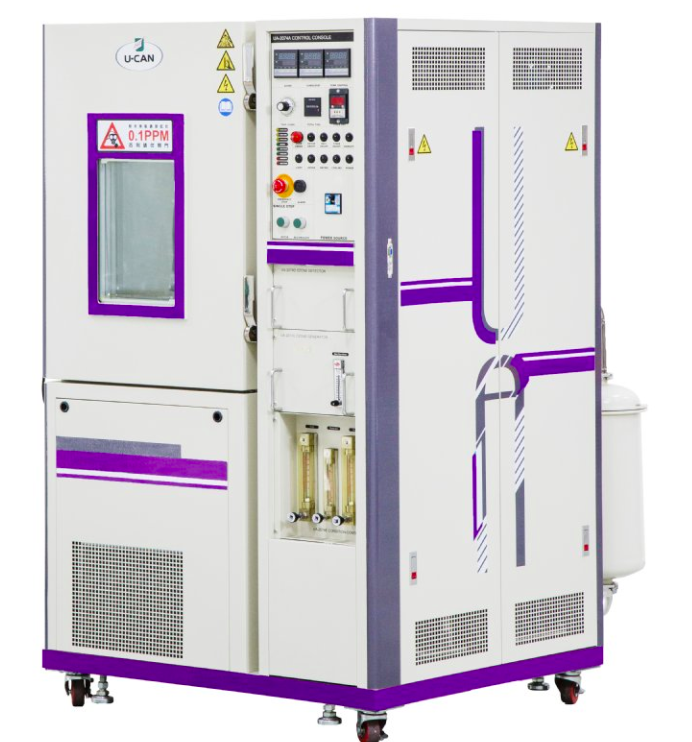
UA-2074
UA-2074
1. In compliance with ASTM D1171/D1149, DIN/EN 27326, DIN 53509, JIS K-6259, ISO 1431/10960.
2. Ozone concentration accuracy : 2% of full scale.
3. Ozone concentration range: 25-500pphm, high concentration range of 30,000pphm or higher are available.
4. Temperature range: -20°C~ +100°C±1°C.
5. Modularized ozone detection and generation systems.
6. Functions: dynamic and static testing.
7. Additional options: automatic calibration, image capture, and remote calibration via video.
8. The UA-2074 is used by large rubber manufacturers and quality control departments worldwide, including the Chinese Electrical Sciences Research Institute.
UA-2074 HD
• Manufacturing in compliance with ASTM D-1171, JIS K-6259, and ISO 1431.
• Fully computerized for easy operation.
• Ozone concentration, temperature, chamber humidity and its stability are controlled and dynamic monitored via computer.
• Ozone concentration recorded automatically which ozone being detected automatically 0.1 sec one time and being displayed on the computer screen per 2 sec.
• A modulus machine which simplifies equipment maintenance.
• Co-development and producting with ITRI (Induatrial Technology Research Institute, top technical center in Taiwan) that ensures the machine with the best quailty and most advanced technology, ITRI would issue quality assurance certificate to every machine.
• CE certificated.
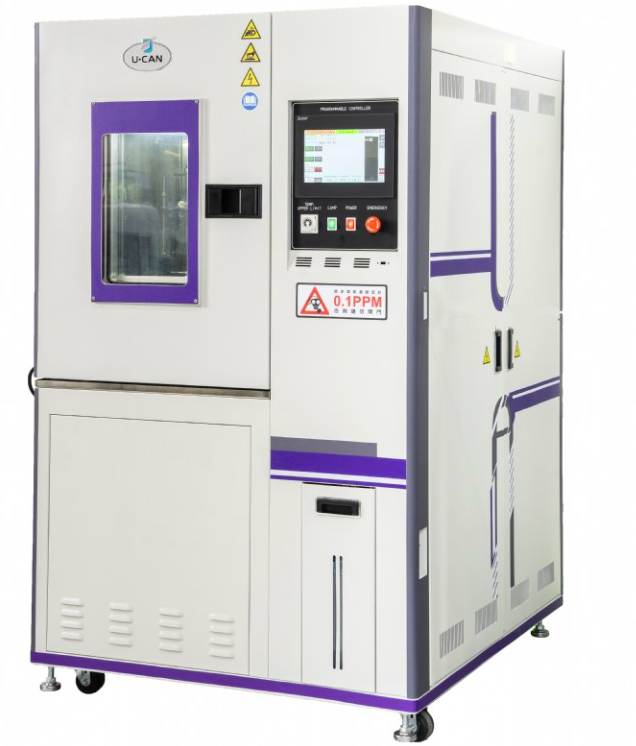
UA-2074 HD
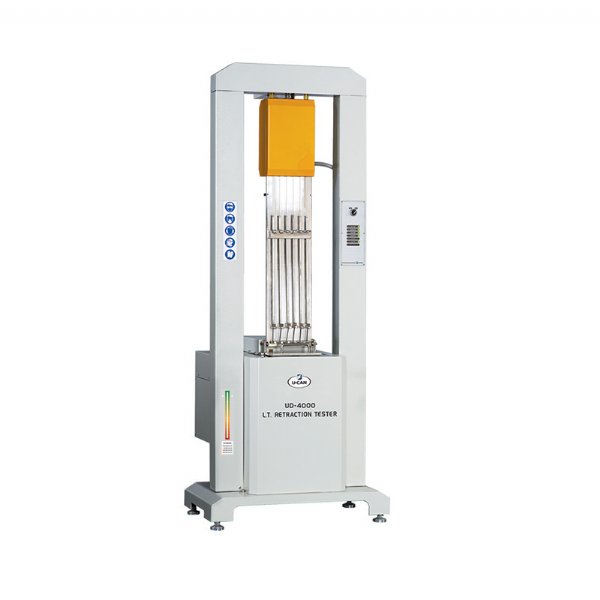
UD-4000
UD-4000
• Data produced by the instrument:
a. TR test: TR10. TR30. TR50. TR70. TRx1, TRx2 (x1, x2 customer defined)
b. Time from test start at calculated TR points
• Graphic representation:
a. Retraction percentage versus Temperature Curves for the 6 samples tested.
b. Temperature versus Time curve during test.
• Automatic performance of the test with adjustment of the thermal cycle and automatic release of the samples on termination of the conditioning time depending on the test procedures used.
• Graphic representation of Retraction curves for each of the 6 samples and of Test Bath temperature during test.
• Possibility of testing groups of different samples with different percentage elongation during the same test.
• Calculation of the significant test results for each sample.
• Calculation of average and standard deviation for each group of samples tested.
• Setting of tolerance limits for conditioning temperature to verify correct prestart conditioning
Filler Dispersion grader FDG-A1
1. In compliance with ASTM D7723 and ISO 11345 (testing methods C, D & E).
Helps user to maintain mix quality and optimize mix process.
2. Auto Focusing.
3. Four position LED lighting system.
4. Color camera can directly auto-analyze different colored-specimen.
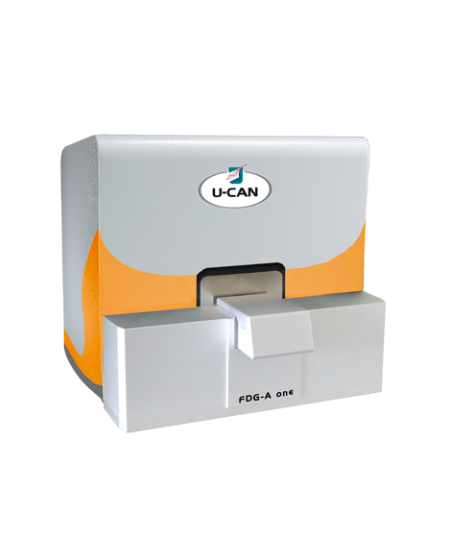
Filler Dispersion grader FDG-A1
Carbon Black Dispersion tester UD-3500
1. Based on ISO 11345, ASTM D7723 test method C, D & E. Provides automatic
evaluation of carbon black dispersion range.
2. ISO Philip 10 grade sample images pre-installed.
A.Carbon black-30X & 100X.
B.Reinforcing carbon black-100X.
C.Reinforcing carbon black/Silica-100X.
D.Semi-reinforcing carbon black-100X.
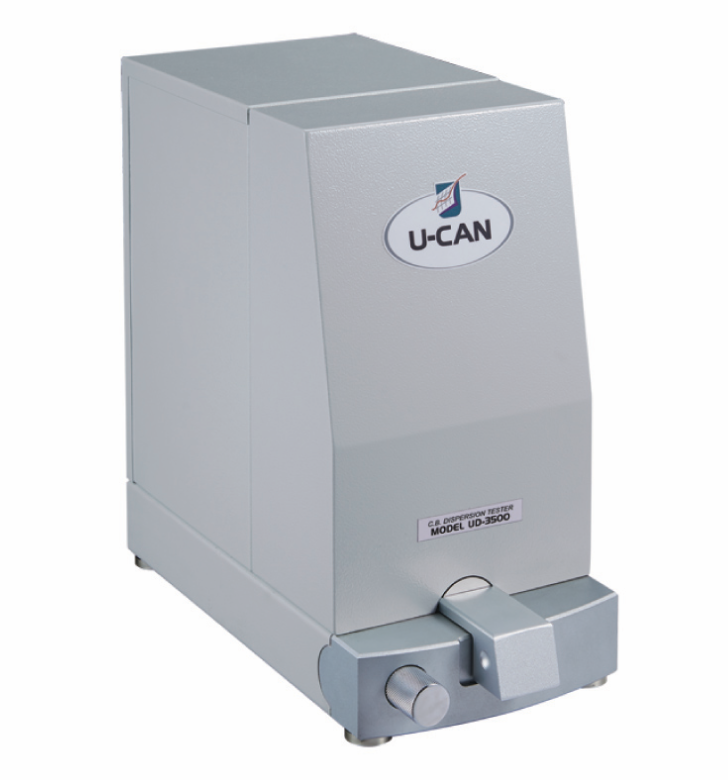
Carbon Black Dispersion tester UD-3500
PVT Tester
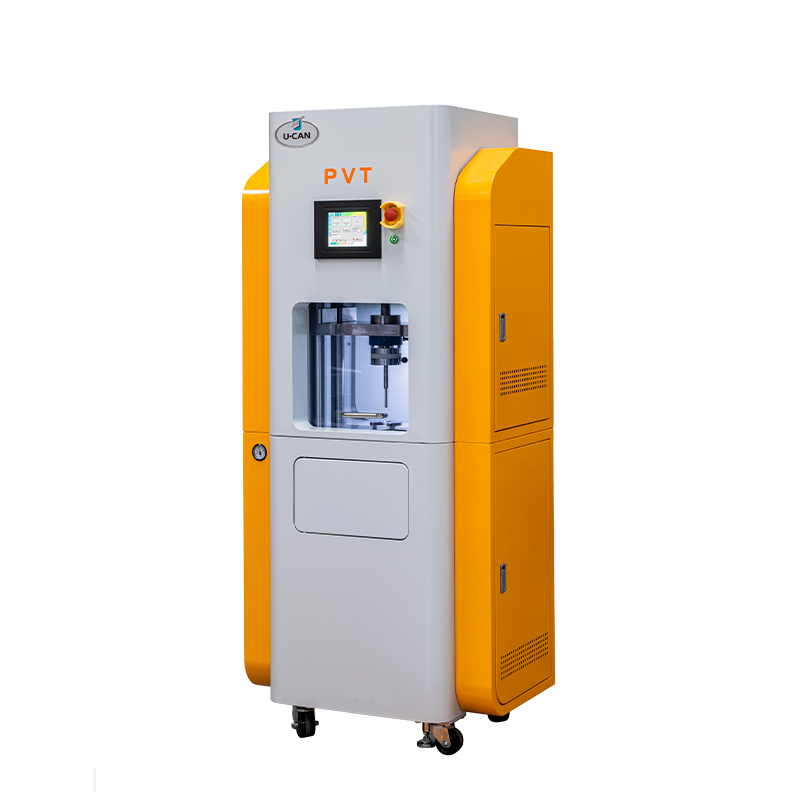
PVT Tester
1.According Standard:ISO 17744
2.Testing Method:Isothermal, Isobaric
3.Dimention:1935x910x590mm
4.Weight:550kg
5.Temperature Control
-Temperature Range:Room Temperature+5°~400℃
-Control Method:PID Control
-Temperature Accuracy:±0.3℃
-Temperature Resolution:0.1℃
6.Pressure Control
-Force Transducer:25KN
-Accuracy of Range:0.25%
-Maximum Pressure:2500bar
7.Displacement Detector
-Maximum Distance:60mm
-Measuring Method:Optical Linear Encoder
-Encoder Resolution:1um
8.Servo Motor Driving System
-Minimum Displacement:0.12um
-Speed Setting Range:0~1000mm/min
9.Diameter of Barrel & Piston:φ7.8mm
10.Cooling Method:Flow Control Air Cooling
11.Operator Interface:Touch Panel
12.Power Supply:AC220V,3phase,60Hz
PVTC A1 Analyser
In semiconductor packaging industry, most numerical simulation of shrinkage would only consider the thermal effect of material.
However, in many case study, the significant difference between simulation and reality is not only the value of deformation but also the trend of warpage.
Analysis shows the cure-induced shrinkage of epoxy is the key. In those cases the effect of cure-induced are at the same level as the thermal effect.
PVTC Analyzer can test the specific volume or volume change under various temperature and pressure to build up the relationship between volume and degree of cured.
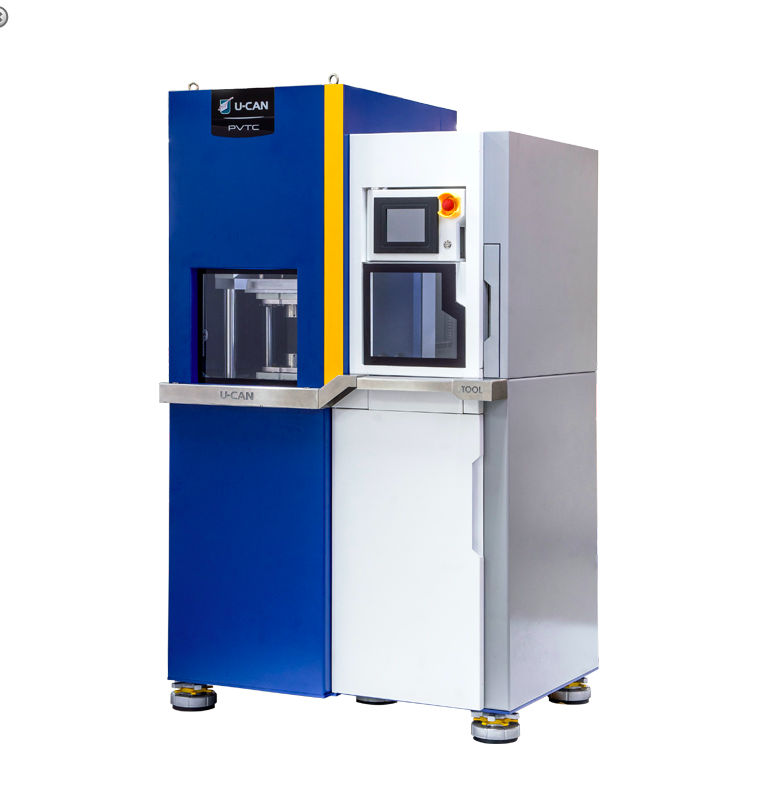
PVTC A1 Analyser
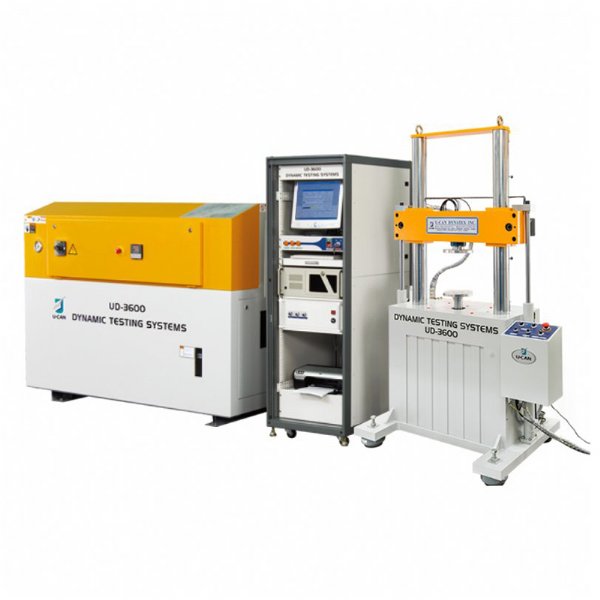
UD-3600 (200 HZ)
UD-3600 (200 HZ)
- Waveform : Automatically generate following waveform
a. Sine waveform
b. Triangular waveform
c. Square waveform - Data : Provide following data in real-time
a. Absolute elastic constant (K*)
b. Storage elastic constant K’ (Store K’)
c. Loss elastic constant K” (Loss K”)
d. Loss angle (Angle δ)
e. Loss factor (tan δ)
f. Decrement coefficient (Damping C)
g. Peak displacement value (Disp X)
h. Peak-load value (Force P)
i. frequency
UD-3600 ( With Temperature Oven)
- Waveform : Automatically generate following waveform
a. Sine waveform
b. Triangular waveform
c. Square waveform - Data : Provide following data in real-time
a. Absolute elastic constant (K*)
b. Storage elastic constant K’ (Store K’)
c. Loss elastic constant K” (Loss K”)
d. Loss angle (Angle δ)
e. Loss factor (tan δ)
f. Decrement coefficient (Damping C)
g. Peak displacement value (Disp X)
h. Peak-load value (Force P)
i. frequency
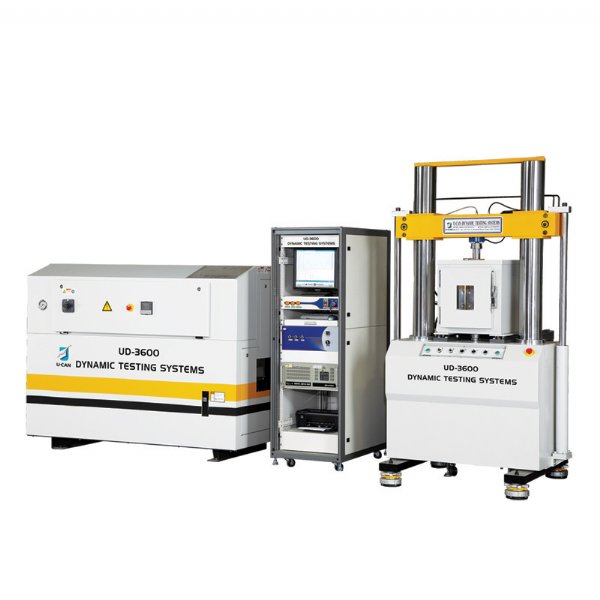
UD-3600 ( With Temperature Oven)

MDR - A2 (Moving Die Rheometer)
UD-3600 XYZ
- Waveform : Automatically generate following waveform
a. Sine waveform
b. Triangular waveform
c. Square waveform - Data : Provide following data in real-time
a. Absolute elastic constant (K*)
b. Storage elastic constant K’ (Store K’)
c. Loss elastic constant K” (Loss K”)
d. Loss angle (Angle δ)
e. Loss factor (tan δ)
f. Decrement coefficient (Damping C)
g. Peak displacement value (Disp X)
h. Peak-load value (Force P)
i. frequency
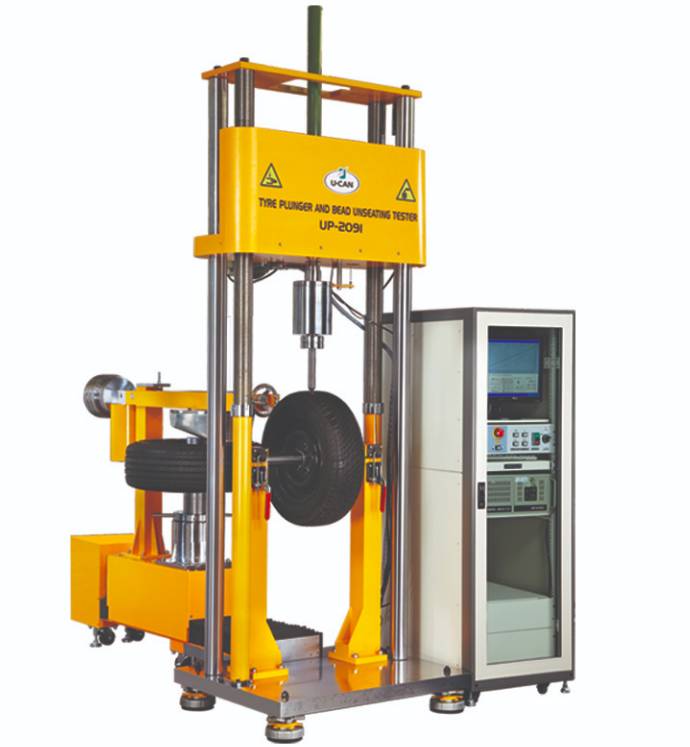
UP-2091
UP-2091 Tyre plunger tester - Light
1. In compliance ASTM F414, ISO 10191, DOT, & JIS D4230.
2. Displays plunger energy, strain, force, testing time, and average value of
destructive energy.
3. Capacity: 50KN with facilitated devices.
4. Test types: plunger and bead unseating tests.
UP-2092 tyre plunger tester - Heavy
1. Modularized design for up to thirteen testing functions.
2. Based on American & European testing standards.
3. PC & software provides automatic data analysis.
4. Used by the world’s 10 largest tyre manufacturers in Asia, Europe, and America.
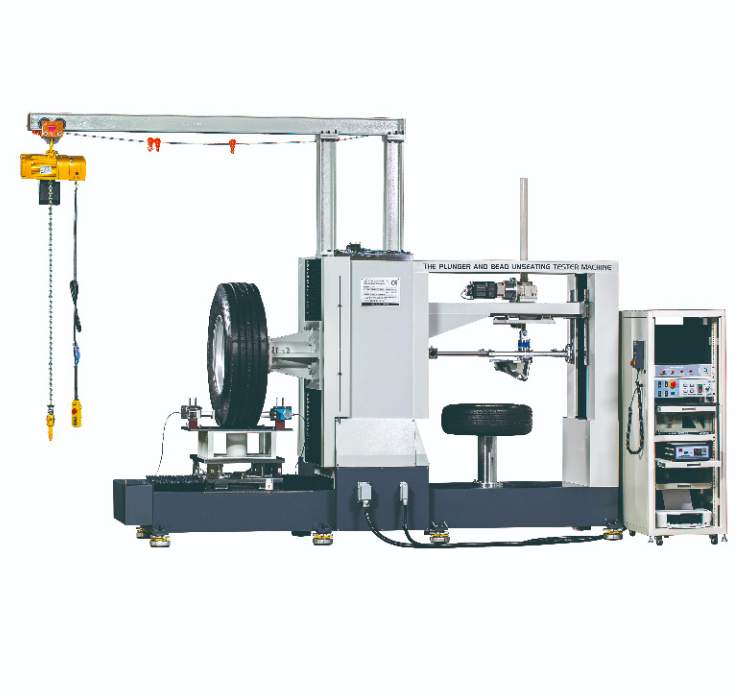
UP-2092
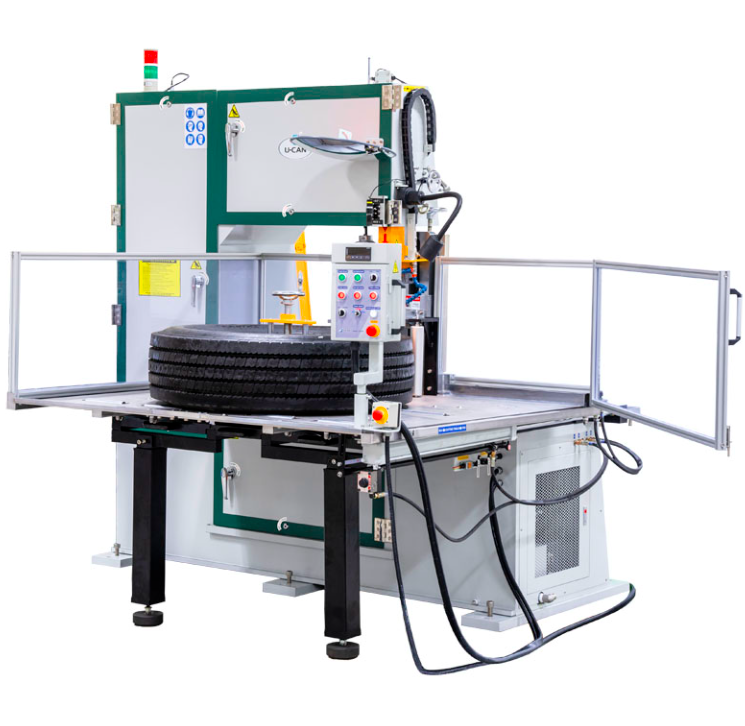
UA- 2087
UA- 2087 Tyre section cutting machine
- Fast speed to cut off truck or car tires.
- Stable cutting speed with Tungsten steel material blade provides excellencent cutting results.
- Tyre cutting machine can be used to cut with all manufacture brands with max outer diameter to 1400mm.
- Stepless feeding rate let uer to change cutting speed upon tyre size to improve testing efficiency.
UA- 2079
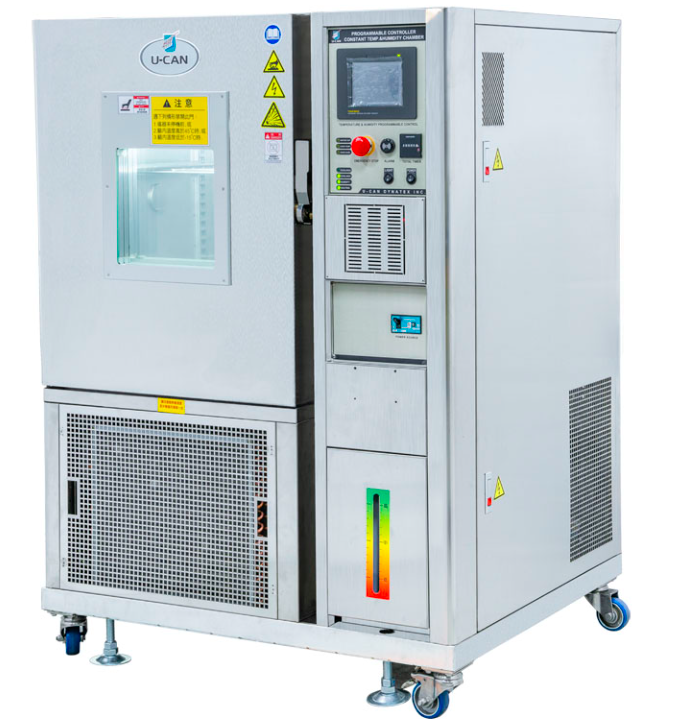
UA- 2079 Constant temperature and humidity chamber
• Temperature and humidity are controlled by P.I.D microcomputer.
• Well suited for testing with a wide range of operating temperature and
humidity conditions.
• High temperature and humidity uniformity.
• Clear and large view window.
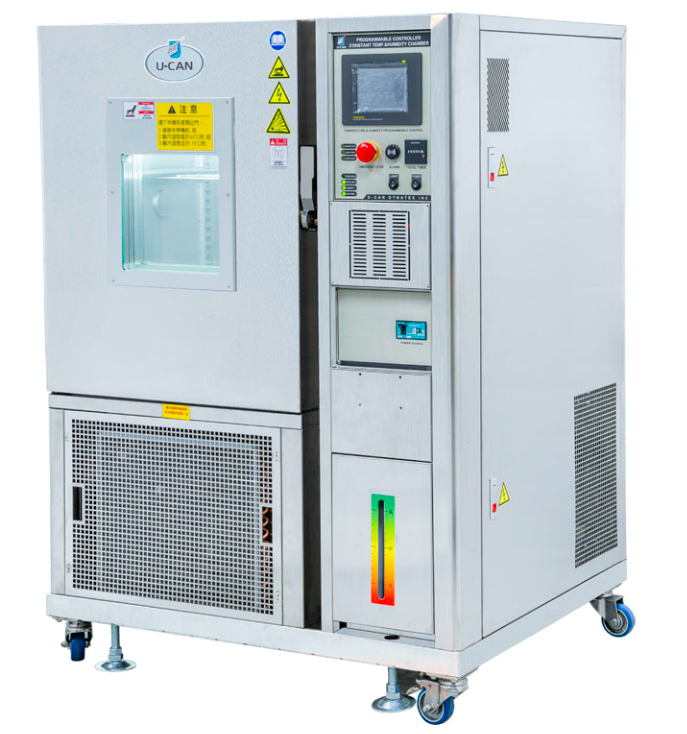
UA- 2079X Constant temperature and humidity chamber Upgrade
• Temperature and humidity are controlled by P.I.D microcomputer.
• Well suited for testing with a wide range of operating temperature and
humidity conditions.
• With low temperature and humidity fluctuation.
• High temperature and humidity uniformity
UA- 2079X
UA- 2237
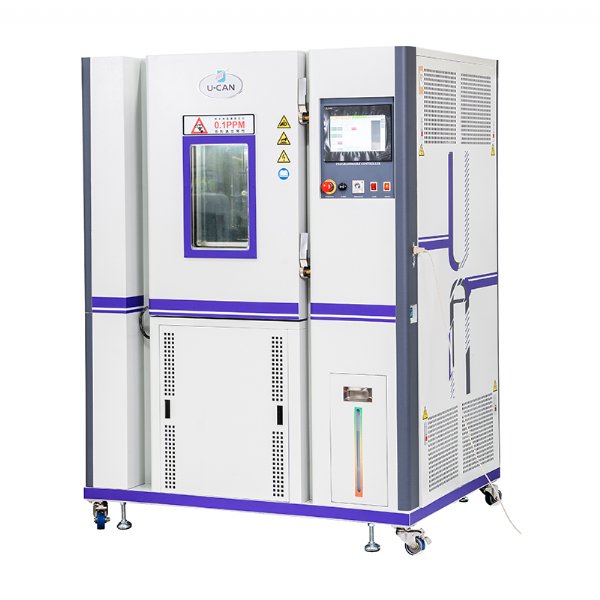
UA- 2237 Comprehensive environmental testing machine
New features
1.Accuracy increased 5 times than previous model
2.High stability weighing sensor
3.Auto-weighing function
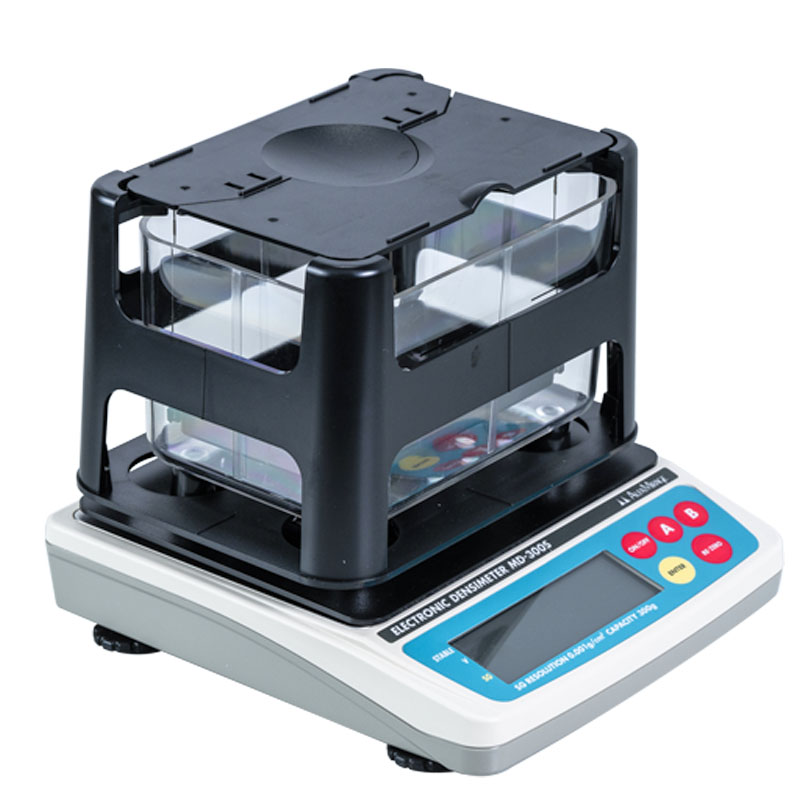
4.Powder Density, which improves working efficiency and accuracy.
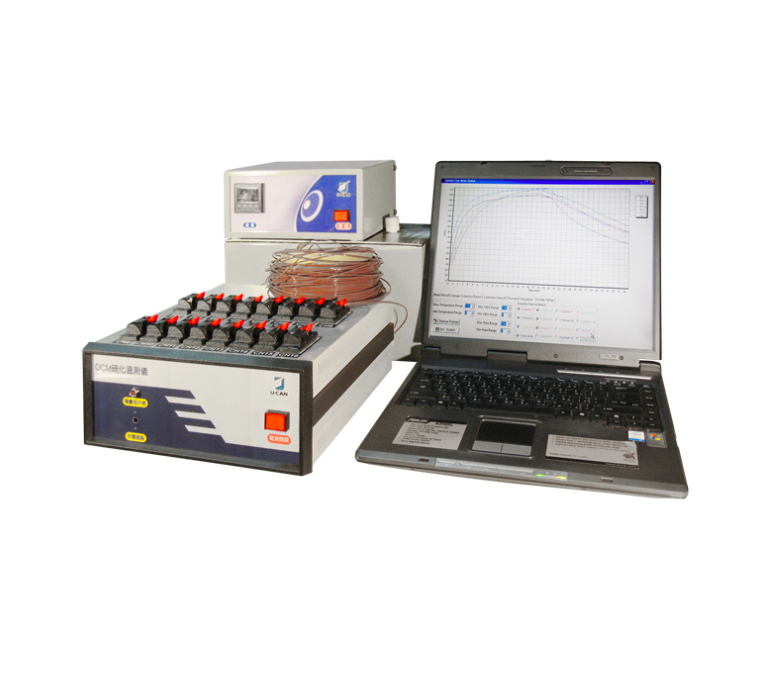
2020 - OCAS
Functions
- Including temperature measuring system and temperature calibration system.
- Analyzing data according to the test result from Rheometer and from temperature variation tendency.
- Offering CEQ (Curing Equivalent Quantity) or cure rate at any time during curing and the best press on time.
Features
a. Power: 110/220V, 50/60Hz
b. Max. 16 channels
c. Temp accuracy: 0.01
d. Offering both index of CEQ(Curing Equivalent Quantity) and Cure rate, enable user to determine more precisely the cure time.
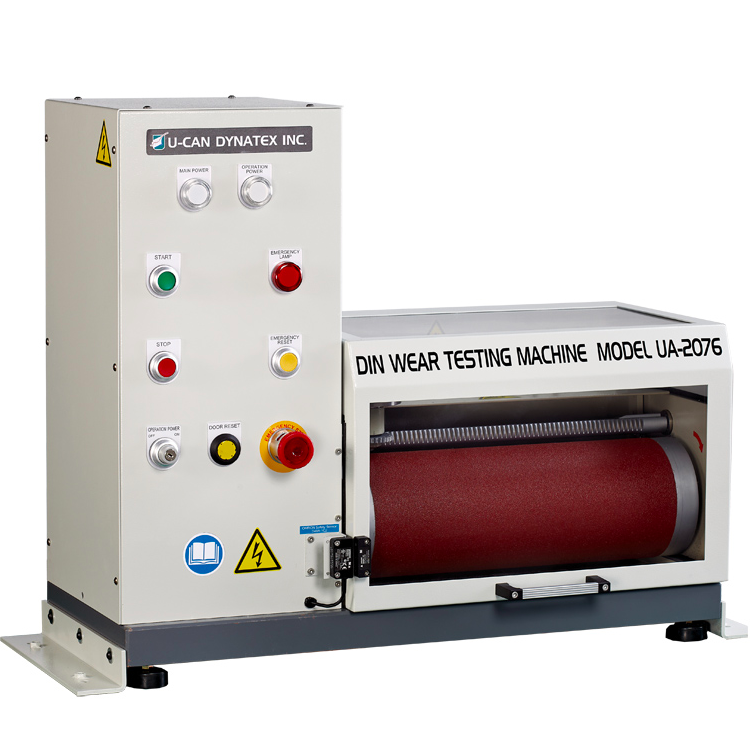
UA-2076 DIN type Abrasion resistance tester
UA-2076 DIN type Abrasion Tester is designed according to the DIN-53516 standard.
The main function is to use specified sand paper to rub the surface of specimen, and after a setup abrasive distance, evaluate the following conditions of the surface after test:
1. Worn out condition
2. The loss of the weight
3. The loss of the physical volume
4. The thickness that been worn out, etc.
By using NBS Standard rubber to ratio the endurance characteristic of abrasion for this material.
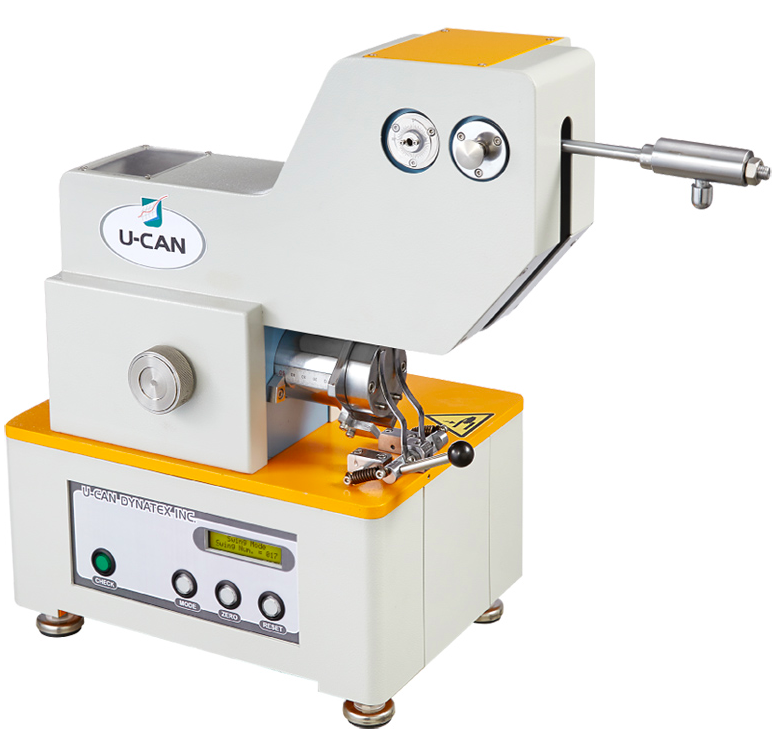
UA-2207 Rebound Resilience Tester
Features
• Manufacturing standards : ASTM D1054 , DIN 53512 , DIN 53573 , ISO 4662
• Drop angle of pendulum : 90o
• Impact action : 0.5J/0.2J
• Range of Indication: 0~100% (scale value: 1%)
• Impact velocity : 2 m/s
• Adjusting range of specimen thickness : 0~60mm
• Assist fitting : grandienter
• Temperature chamber :
a. Temperature : Working range from room temp to 200oC
b. Exterior material : steel
c. Interior material : SUS304 stainless steel plate (2B polish)
d. Weight: Approximately 65 kg
e. Dimension: 820(W) X 530(D) X 970(H)mm
• Machine dimension : 610(W) X 370(H) X 180(D) / mm (temperature chamber excluded)
• Machine weight : Approximately 25 kg (temperature chamber excluded)
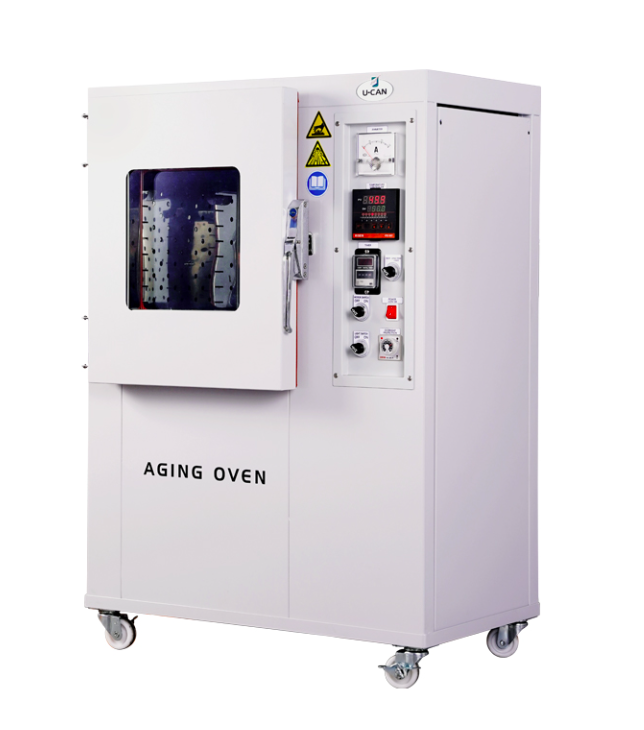
UA-2071A Small Size
UA-2071A Small Size
- Aging oven is used for degradation study of plastic & rubber when the heat is subjected to a rotational condition for a specific time. Theoretically, a test session in 70oC for 24 hours straight is equivalent to six months of exposure the specimen in normal conditions.
- Viewing window in the test chamber.
- High precision and stability temperature provided.
- Even flow through test chamber.
UA-2071B Large size
- Aging oven is used for degradation study of plastic & rubber when the heat is subjected to a rotational condition for a specific time. Theoretically, a test session in 70oC for 24 hours straight is equivalent to six months of exposure the specimen in normal conditions.
- Viewing window in the test chamber.
- High precision and stability temperature provided.
- Even flow through test chamber.
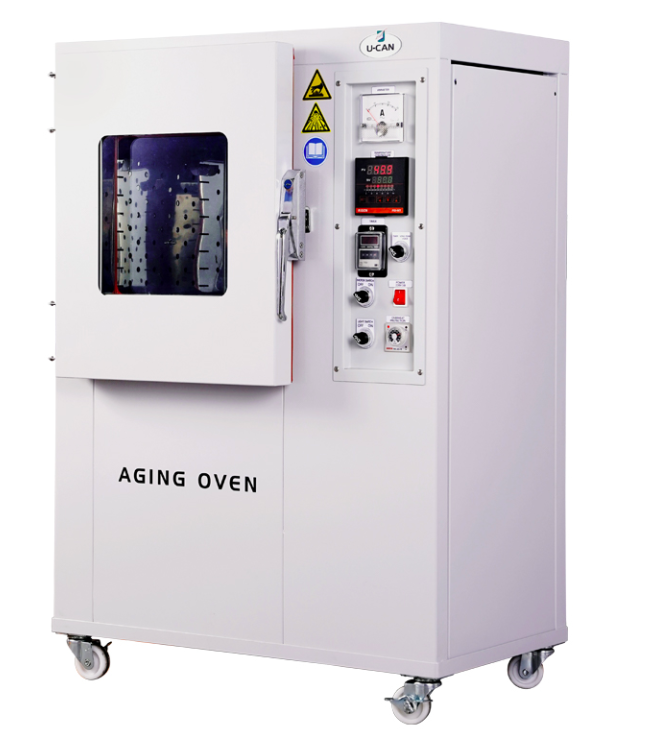
UA-2071B Large size
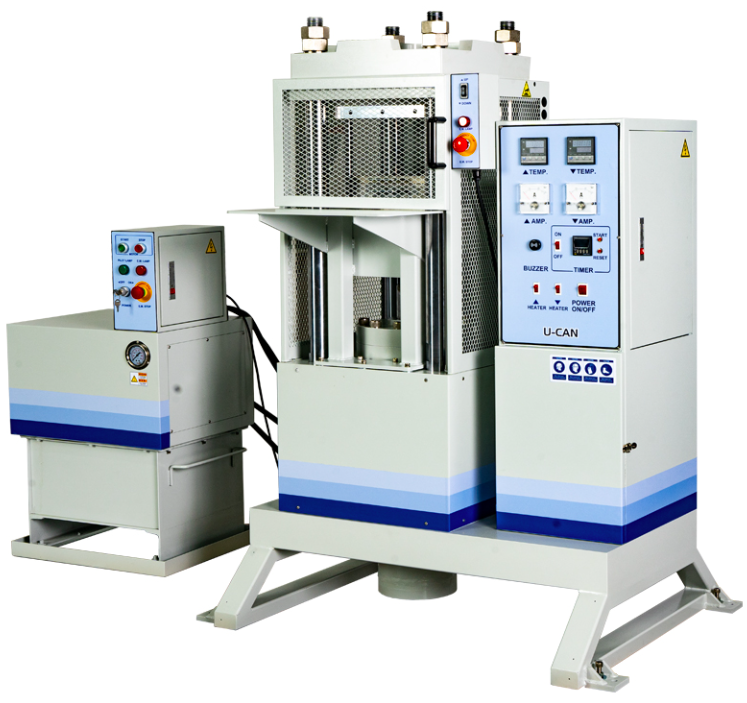
UA-2077
UA-2077
A. Clamping Force : 20 tons
B. Max Working Pressure:70Bar
C. Piston Diameter:200mm
D. Max Stroke:250mm
E. Heating Capacity:6KW
F. Platen Dimension : 300(W)x300(L)mm
G. Oil Reservoir:40L
H. Main Horsepower:3HP
I. Power:3 phase 220V 50Amp
J. Weight:approximate 1,000kg
K. Not include the sample mould

UA-2077
UA-2077
A. Clamping Force : 20 tons
B. Max Working Pressure:70Bar
C. Piston Diameter:200mm
D. Max Stroke:250mm
E. Heating Capacity:6KW
F. Platen Dimension : 300(W)x300(L)mm
G. Oil Reservoir:40L
H. Main Horsepower:3HP
I. Power:3 phase 220V 50Amp
J. Weight:approximate 1,000kg
K. Not include the sample mould
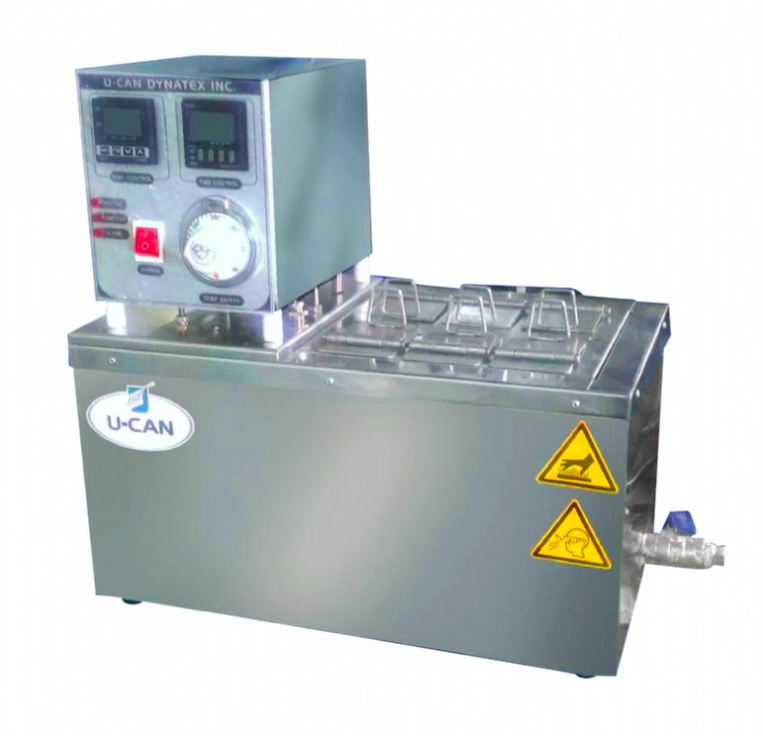
Oil bath tester
UA-2072
Pneumatic cutter
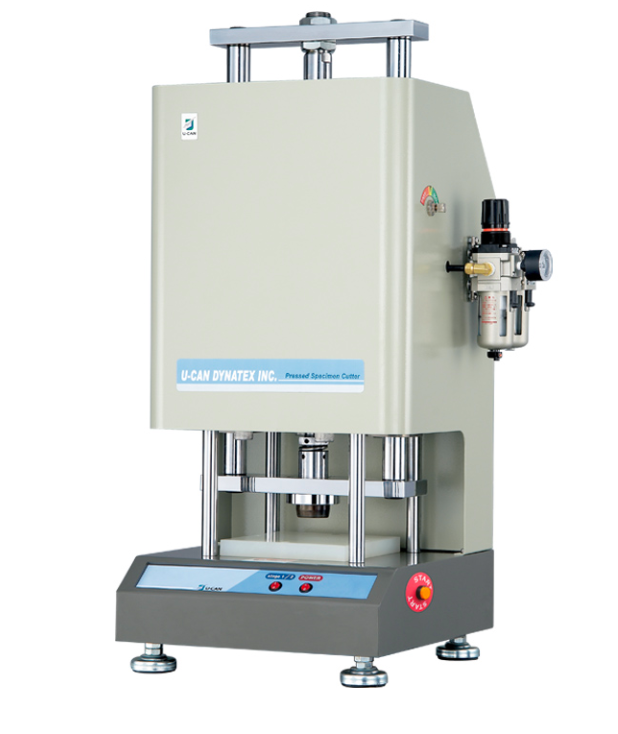
Functions
- Two stages mode
One stage mode is used to prepare specimen for Mooney Viscometer and Tensile Tester. (To be used along with mooney viscometer cutter or tensile tester cutter.)
b. Two stage mode is used to prepare specimen for rheometer. By using unquie rheometer specimen cutter, user can obtain specimen with the same volume. (From the same compound) - Standard air pressure is 4.5kg / cm2, it can be adjusted accordingly to the maximum of 10kg / cm2.
Features
- Dimension : 835 (H) x 390 (L) x 420 mm (W)
- Electric Power : AC220±10%, 50 / 60Hz +3Hz, 7A, Single phase.(Or discretionary at user’s pleasure)
- Air Pressure Suppey : 65Psi or 4.5kg / cm2(Air-compressor is to be user’s own equipment)
- Net Weight : approx. 110kg

MDR - A2 (Moving Die Rheometer)
MDR - A2 (Moving Die Rheometer)
1. In compliance with ISO 6502, ASTM D5289, DIN 53529, JIS K6300-2, and GB/T 16584.
2. Moving Die Rheometer provides in-depth scorch and optimum cure time analysis.
3. Mis-compounding system advises of possible causes for failed compounds.
4. The latest version of U-CAN’s proprietary software is preinstalled. U-LIMS software is also available for purchase upon request, which allows users to set test conditions and view results remotely via an Internet browser.
5. Export to Excel.
6. Auto feeding sampler.
MDR - A1 (Moving Die Rheometer)
1. In compliance with ISO 6502, ASTM D5289, DIN 53529, JIS K6300-2, and GB/T 16584.
2. Moving Die Rheometer provides in-depth scorch and optimum cure time analysis.
3. Mis-compounding system advises of possible causes for failed compounds.
4. The latest version of U-CAN’s proprietary software is preinstalled. U-LIMS software is also available for purchase upon request, which allows users to set test conditions and view results remotely via an Internet browser.
5. Export to Excel.

MDR - A1 (Moving Die Rheometer)
MDR - U6S (Moving Die Rheometer)
1. In compliance with ISO 6502, ASTM D5289, JIS K6300-2, and GB/T 16584.
2. Provides various cure data and graphical curves.
3. Simple, quick installation.
4. On the front side, light color indicates whether a sample has passed (in blue) or failed (in red) the testing standards.

MDR - U6S (Moving Die Rheometer)
UR-2010 SD (Rotorless Rheometer)
1. The UR-2010SD’s upper and lower die cavities feature a rubber
seal that maintains the pressure inside the dies while testing. This model is typically referred to as a MDR rheometer.
2. Both models are in compliance with ASTM D5289, ISO 6502, JIS K6300-2 and GB/T 16584.
3. Auto-cailbration of loss angle in both models.

UR-2010 SD (Rotorless Rheometer)
UR-2010 (Rotorless Rheometer)
1. A. UR-2010 does not include a seal, but rather uses excess rubber from the specimen to seal the die cavity’s internal pressure.
B. The UR-2010 features a larger die cavity and therefore requires more time for heating, more suitable for the slowly curing products.
2. Both models are in compliance with ASTM D5289, ISO 6502, JIS K6300-2 and GB/T 16584.
3. Auto-cailbration of loss angle in both models.

UR-2010 (Rotorless Rheometer)

UR-2030 (Foam Pressure Rheometer)
UR-2030 (Foam Pressure Rheometer)
1. A. UR-2030SD is based on UR-2010SD which contains all UR-2010SD’s functions, features, and additional software/hardware for measuring foam pressure.
B. UR-2030 is based on UR-2010 which contains all UR-2010’s functions, features, and additional software/hardware for measuring foam pressure.
2. Both models are in compliance with ASTM D5289, ISO 6502, JIS K6300-2 and GB/T 16584.
3. Both models can be used on measuring crosslinking and foam pressure of rubber or EVA. Suitable for automobile rubber parts , outsole/insole shoes , sports tools , some shock absorption products,…etc.
UR-2030 SD (Foam Pressure Rheometer)
1. A. UR-2030SD is based on UR-2010SD which contains all UR-2010SD’s functions, features, and additional software/hardware for measuring foam pressure.
B. UR-2030 is based on UR-2010 which contains all UR-2010’s functions, features, and additional software/hardware for measuring foam pressure.
2. Both models are in compliance with ASTM D5289, ISO 6502, JIS K6300-2 and GB/T 16584.
3. Both models can be used on measuring crosslinking and foam pressure of rubber or EVA. Suitable for automobile rubber parts, outsole/insole shoes , sports tools , some shock absorption products,…etc.

UR-2030 SD (Foam Pressure Rheometer)

UR-2070 (Oscillating Disc Rheometer)
UR-2070 (Oscillating Disc Rheometer)
1. In compliance with manufacturing standards ASTM D2084 , ISO 6502.
2. Providing S’, S”, S*, ML, MH, CRI, loss angle, tangent δ, etc.
3. Plots and % of compounding homogeneity variation.
4. Excellent reproducibility and repeatibility by our exclusive DSP analyzing program.
5. Automatically calibrate loss angle and torque.
6. High sampling rate up to 1200 points per one oscillating sign wave to reflect the curing and chemical interaction.
7. Automatic zero adjustment at every start of testing.
8. High speed temperature recovery.

UM-2050
UM-2050
1. In compliance with ASTM D1646, ISO 289, JIS K-6300, GB/T 1232 and 1233.
2. Provides MI, ML1+4, ML1+8, T80, X30……etc, and scorch time T5, T35 ; T3, T18.
3. A. Relaxation time(Tx) to decay X% of mooney viscosity.
B. Power Law Decay Model Analysis : a-Slope, k-intercept, A-area, r-regression coefficient.
C. Plot of log mooney unit versus log time.
4. Provides melting and cure speed rate curves.
5. Automatically resets test readings to zero before each test.
UM-2050 ES Upgraded
1. In compliance with ASTM D1646, ISO 289, JIS K-6300, GB/T 1232 and 1233.
2. Provides MI, ML1+4, ML1+8, T80, X30……etc, and scorch time T5, T35 ; T3, T18.
3. A. Relaxation time(Tx) to decay X% of mooney viscosity. B. Power Law Decay Model Analysis : a-Slope, k-intercept, A-area, r-regression coefficient. C. Plot of log mooney unit versus log time.
4. Provides melting and cure speed rate curves.
5. Automatically resets test readings to zero before each test
6. ES system managing the data sampling, processing and transmission.
7. Compatible with 32/64 bit of windows and OS
8. MS Sql database system for convenient datat management
9. With lot system, user may see test conditions and view test results remotely with internet or mobile device

UM-2050 ES Upgraded

UT-2060
UT-2060
1. Load capacity 2,000 kgf.
2. PC & Software provides automatic data analysis.
3. Various fixtures and load cells available.
4. Includes multiple testing functions.

UT-2080
UT-2080
1. Load capacity 1,000 kgf.
2. PC & Software provides automatic data analysis.
3. Various fixtures and load cells available.
4. Extended safety options: protective viewing window, electrical circuit safety system, protective fence.
5. Includes multiple testing functions.

UT-3100
UT-3100
1. Capacity : below 125kgf
2. Providing force, strain, and stress values at breaking point and maximum point.
3. Showing all testing curves on the monitor.
4. Printing out all testing values and curves.
5. Elongation test is an optional function for choosing.
6. Automatic zero adjustmert at the start of each testing.

UT-3200
UT-3200
• Capacity : below 5,000kgf
• Windows XP based test system designed for easy operation.
• Automatic zero adjustment at the start of test.
• Applied for testing rubber, plastic, leather, metal, yarn/textile, cable/wire
products.
• Provide tensile strength test, tear test, H-drawing test, compression test
including set-up of its stop force.
• Provide adhensive test able to auto-calculate its average force at low, middle,
high point.
• All test curves and values shown simultaneously while testing. It not only
enables the user to gain and save feedback information for product parameters;
also it allows to recall and print out for documentation purpose.

UT-3500
UT-3500
• Capacity : below 10,000kgf
• Windows XP based test system designed for easy operation.
• Automatic zero adjustment at the start of test.
• Applied for testing rubber, plastic, leather, metal, yarn/textile, cable/wire products.
• Provide tensile strength test, tear test, H-drawing test, compression test including set-up of its stop force.
• Provide adhensive test able to auto-calculate its average force at low, middle, high point.
• All test curves and values shown simultaneously while testing. It not only enables the user to gain and save feedback information for product parameters; also it allows to recall and print out for documentation purpose.

UT-3700
UT-3700
1. Load capacity 25,000 kgf
2. Tests: tension, compression, tear, adhesion, shear strength, bending and drawing.
3. Applications: for testing special rubbers, metals, conveyor belts, continuous tracks, and more.
4. PC and proprietary software provide automatic analysis.
RPA - V1
1. Analyzes the characteristics of rubber samples before, during and after curing.
2. Provides frequency scanning, strain scanning, temperature scanning, and time scanning.
3. Conducts testing in compliance with ASTM D6204.

RPA - V1

UA-2074
UA-2074
1. In compliance with ASTM D1171/D1149, DIN/EN 27326, DIN 53509, JIS K-6259, ISO 1431/10960.
2. Ozone concentration accuracy : 2% of full scale.
3. Ozone concentration range: 25-500pphm, high concentration range of 30,000pphm or higher are available.
4. Temperature range: -20°C~ +100°C±1°C.
5. Modularized ozone detection and generation systems.
6. Functions: dynamic and static testing.
7. Additional options: automatic calibration, image capture, and remote calibration via video.
8. The UA-2074 is used by large rubber manufacturers and quality control departments worldwide, including the Chinese Electrical Sciences Research Institute.
UA-2074 HD
• Manufacturing in compliance with ASTM D-1171, JIS K-6259, and ISO 1431.
• Fully computerized for easy operation.
• Ozone concentration, temperature, chamber humidity and its stability are controlled and dynamic monitored via computer.
• Ozone concentration recorded automatically which ozone being detected automatically 0.1 sec one time and being displayed on the computer screen per 2 sec.
• A modulus machine which simplifies equipment maintenance.
• Co-development and producting with ITRI (Induatrial Technology Research Institute, top technical center in Taiwan) that ensures the machine with the best quailty and most advanced technology, ITRI would issue quality assurance certificate to every machine.
• CE certificated.

UA-2074 HD

UD-4000
UD-4000
• Data produced by the instrument:
a. TR test: TR10. TR30. TR50. TR70. TRx1, TRx2 (x1, x2 customer defined)
b. Time from test start at calculated TR points
• Graphic representation:
a. Retraction percentage versus Temperature Curves for the 6 samples tested.
b. Temperature versus Time curve during test.
• Automatic performance of the test with adjustment of the thermal cycle and automatic release of the samples on termination of the conditioning time depending on the test procedures used.
• Graphic representation of Retraction curves for each of the 6 samples and of Test Bath temperature during test.
• Possibility of testing groups of different samples with different percentage elongation during the same test.
• Calculation of the significant test results for each sample.
• Calculation of average and standard deviation for each group of samples tested.
• Setting of tolerance limits for conditioning temperature to verify correct prestart conditioning
Filler Dispersion grader FDG-A1
1. In compliance with ASTM D7723 and ISO 11345 (testing methods C, D & E).
Helps user to maintain mix quality and optimize mix process.
2. Auto Focusing.
3. Four position LED lighting system.
4. Color camera can directly auto-analyze different colored-specimen.

Filler Dispersion grader FDG-A1
Carbon Black Dispersion tester UD-3500
1. Based on ISO 11345, ASTM D7723 test method C, D & E. Provides automatic
evaluation of carbon black dispersion range.
2. ISO Philip 10 grade sample images pre-installed.
A.Carbon black-30X & 100X.
B.Reinforcing carbon black-100X.
C.Reinforcing carbon black/Silica-100X.
D.Semi-reinforcing carbon black-100X.

Carbon Black Dispersion tester UD-3500
PVT Tester

PVT Tester
1.According Standard:ISO 17744
2.Testing Method:Isothermal, Isobaric
3.Dimention:1935x910x590mm
4.Weight:550kg
5.Temperature Control
-Temperature Range:Room Temperature+5°~400℃
-Control Method:PID Control
-Temperature Accuracy:±0.3℃
-Temperature Resolution:0.1℃
6.Pressure Control
-Force Transducer:25KN
-Accuracy of Range:0.25%
-Maximum Pressure:2500bar
7.Displacement Detector
-Maximum Distance:60mm
-Measuring Method:Optical Linear Encoder
-Encoder Resolution:1um
8.Servo Motor Driving System
-Minimum Displacement:0.12um
-Speed Setting Range:0~1000mm/min
9.Diameter of Barrel & Piston:φ7.8mm
10.Cooling Method:Flow Control Air Cooling
11.Operator Interface:Touch Panel
12.Power Supply:AC220V,3phase,60Hz
PVTC A1 Analyser
In semiconductor packaging industry, most numerical simulation of shrinkage would only consider the thermal effect of material.
However, in many case study, the significant difference between simulation and reality is not only the value of deformation but also the trend of warpage.
Analysis shows the cure-induced shrinkage of epoxy is the key. In those cases the effect of cure-induced are at the same level as the thermal effect.
PVTC Analyzer can test the specific volume or volume change under various temperature and pressure to build up the relationship between volume and degree of cured.

PVTC A1 Analyser

UD-3600 (200 HZ)
UD-3600 (200 HZ)
- Waveform : Automatically generate following waveform
a. Sine waveform
b. Triangular waveform
c. Square waveform - Data : Provide following data in real-time
a. Absolute elastic constant (K*)
b. Storage elastic constant K’ (Store K’)
c. Loss elastic constant K” (Loss K”)
d. Loss angle (Angle δ)
e. Loss factor (tan δ)
f. Decrement coefficient (Damping C)
g. Peak displacement value (Disp X)
h. Peak-load value (Force P)
i. frequency
UD-3600 ( With Temperature Oven)
- Waveform : Automatically generate following waveform
a. Sine waveform
b. Triangular waveform
c. Square waveform - Data : Provide following data in real-time
a. Absolute elastic constant (K*)
b. Storage elastic constant K’ (Store K’)
c. Loss elastic constant K” (Loss K”)
d. Loss angle (Angle δ)
e. Loss factor (tan δ)
f. Decrement coefficient (Damping C)
g. Peak displacement value (Disp X)
h. Peak-load value (Force P)
i. frequency

UD-3600 ( With Temperature Oven)

MDR - A2 (Moving Die Rheometer)
UD-3600 XYZ
- Waveform : Automatically generate following waveform
a. Sine waveform
b. Triangular waveform
c. Square waveform - Data : Provide following data in real-time
a. Absolute elastic constant (K*)
b. Storage elastic constant K’ (Store K’)
c. Loss elastic constant K” (Loss K”)
d. Loss angle (Angle δ)
e. Loss factor (tan δ)
f. Decrement coefficient (Damping C)
g. Peak displacement value (Disp X)
h. Peak-load value (Force P)
i. frequency

UP-2091
UP-2091 Tyre plunger tester - Light
1. In compliance ASTM F414, ISO 10191, DOT, & JIS D4230.
2. Displays plunger energy, strain, force, testing time, and average value of
destructive energy.
3. Capacity: 50KN with facilitated devices.
4. Test types: plunger and bead unseating tests.
UP-2092 tyre plunger tester - Heavy
1. Modularized design for up to thirteen testing functions.
2. Based on American & European testing standards.
3. PC & software provides automatic data analysis.
4. Used by the world’s 10 largest tyre manufacturers in Asia, Europe, and America.

UP-2092

UA- 2087
UA- 2087 Tyre section cutting machine
- Fast speed to cut off truck or car tires.
- Stable cutting speed with Tungsten steel material blade provides excellencent cutting results.
- Tyre cutting machine can be used to cut with all manufacture brands with max outer diameter to 1400mm.
- Stepless feeding rate let uer to change cutting speed upon tyre size to improve testing efficiency.

UA- 2079
UA- 2079 Constant temperature and humidity chamber
• Temperature and humidity are controlled by P.I.D microcomputer.
• Well suited for testing with a wide range of operating temperature and
humidity conditions.
• High temperature and humidity uniformity.
• Clear and large view window.
UA- 2079X Constant temperature and humidity chamber Upgrade
• Temperature and humidity are controlled by P.I.D microcomputer.
• Well suited for testing with a wide range of operating temperature and
humidity conditions.
• With low temperature and humidity fluctuation.
• High temperature and humidity uniformity

UA- 2079X

UA- 2237
UA- 2237 Comprehensive environmental testing machine
New features
1.Accuracy increased 5 times than previous model
2.High stability weighing sensor
3.Auto-weighing function
4.Powder Density, which improves working efficiency and accuracy.

2020 - OCAS
Functions
- Including temperature measuring system and temperature calibration system.
- Analyzing data according to the test result from Rheometer and from temperature variation tendency.
- Offering CEQ (Curing Equivalent Quantity) or cure rate at any time during curing and the best press on time.
Features
a. Power: 110/220V, 50/60Hz
b. Max. 16 channels
c. Temp accuracy: 0.01
d. Offering both index of CEQ(Curing Equivalent Quantity) and Cure rate, enable user to determine more precisely the cure time.

UA-2076 DIN type Abrasion resistance tester
UA-2076 DIN type Abrasion Tester is designed according to the DIN-53516 standard.
The main function is to use specified sand paper to rub the surface of specimen, and after a setup abrasive distance, evaluate the following conditions of the surface after test:
1. Worn out condition
2. The loss of the weight
3. The loss of the physical volume
4. The thickness that been worn out, etc.
By using NBS Standard rubber to ratio the endurance characteristic of abrasion for this material.

UA-2207 Rebound Resilience Tester
Features
• Manufacturing standards : ASTM D1054 , DIN 53512 , DIN 53573 , ISO 4662
• Drop angle of pendulum : 90o
• Impact action : 0.5J/0.2J
• Range of Indication: 0~100% (scale value: 1%)
• Impact velocity : 2 m/s
• Adjusting range of specimen thickness : 0~60mm
• Assist fitting : grandienter
• Temperature chamber :
a. Temperature : Working range from room temp to 200oC
b. Exterior material : steel
c. Interior material : SUS304 stainless steel plate (2B polish)
d. Weight: Approximately 65 kg
e. Dimension: 820(W) X 530(D) X 970(H)mm
• Machine dimension : 610(W) X 370(H) X 180(D) / mm (temperature chamber excluded)
• Machine weight : Approximately 25 kg (temperature chamber excluded)


UA-2071A Small Size
UA-2071A Small Size
- Aging oven is used for degradation study of plastic & rubber when the heat is subjected to a rotational condition for a specific time. Theoretically, a test session in 70oC for 24 hours straight is equivalent to six months of exposure the specimen in normal conditions.
- Viewing window in the test chamber.
- High precision and stability temperature provided.
- Even flow through test chamber.
UA-2071B Large size
- Aging oven is used for degradation study of plastic & rubber when the heat is subjected to a rotational condition for a specific time. Theoretically, a test session in 70oC for 24 hours straight is equivalent to six months of exposure the specimen in normal conditions.
- Viewing window in the test chamber.
- High precision and stability temperature provided.
- Even flow through test chamber.

UA-2071B Large size

UA-2077
UA-2077
A. Clamping Force : 20 tons
B. Max Working Pressure:70Bar
C. Piston Diameter:200mm
D. Max Stroke:250mm
E. Heating Capacity:6KW
F. Platen Dimension : 300(W)x300(L)mm
G. Oil Reservoir:40L
H. Main Horsepower:3HP
I. Power:3 phase 220V 50Amp
J. Weight:approximate 1,000kg
K. Not include the sample mould

Oil bath tester
UA-2072
Pneumatic cutter

Functions
- Two stages mode
One stage mode is used to prepare specimen for Mooney Viscometer and Tensile Tester. (To be used along with mooney viscometer cutter or tensile tester cutter.)
b. Two stage mode is used to prepare specimen for rheometer. By using unquie rheometer specimen cutter, user can obtain specimen with the same volume. (From the same compound) - Standard air pressure is 4.5kg / cm2, it can be adjusted accordingly to the maximum of 10kg / cm2.
Features
- Dimension : 835 (H) x 390 (L) x 420 mm (W)
- Electric Power : AC220±10%, 50 / 60Hz +3Hz, 7A, Single phase.(Or discretionary at user’s pleasure)
- Air Pressure Suppey : 65Psi or 4.5kg / cm2(Air-compressor is to be user’s own equipment)
- Net Weight : approx. 110kg

